READ: Taking a Screenshot Using Jing
| Site: | Fulton |
| Course: | Computer Technology |
| Book: | READ: Taking a Screenshot Using Jing |
| Printed by: | Guest user |
| Date: | Friday, January 2, 2026, 11:21 AM |
Description
Taking a Screenshot Using Jing
What is a Screenshot?
What is a screenshot?A screenshot is an image of the visible items displayed on your computer screen at a given time. This is an example of what my screen looks like right now. I took this picture using screenshot capabilities.


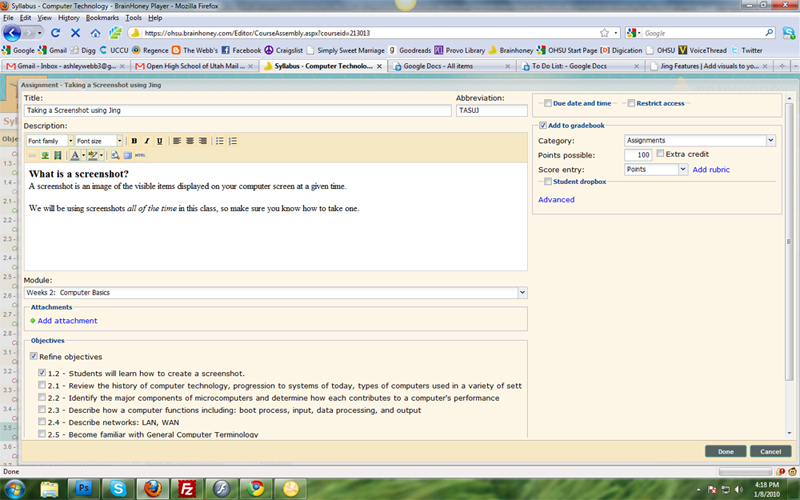
We will be using screenshots all of the time in this class, so make sure you know how to take one. Notice that all the pictures in this tutorial are screenshots. The following steps detail how to take a screenshot.
1. Download Jing
First of all, we need to download Jing. Jing is the program we will use to capture our screenshots and save them to our hard drive on our computer.1. Go to http://www.jingproject.com/.
2. On the right hand side of that website, there will be a "Download" button. It looks like this (See below). Click on it.

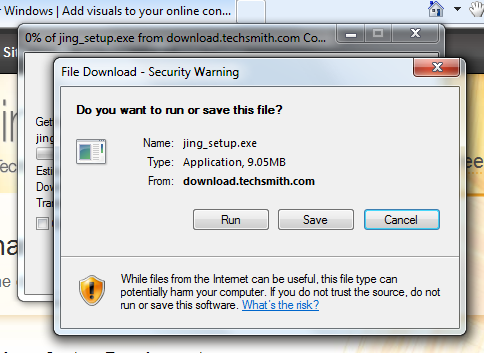
3. A download window will pop up (see below). Hit Run. (If you hit save, the .exe file that you need to run will be on your desktop. Double click it. FIREFOX: If you hit save and it appears in a downloads list, double click it.
2. Install Jing and Set up an Account
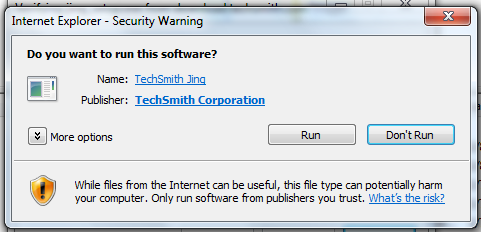
We will now install Jing and set up a Jing account.After downloading the Jing program, the browser MIGHT (if it doesn't, that is okay) ask you if you want to run this software. Click RUN.
The Jing installation wizard will then start to run. You will hit NEXT until it finishes installing.
Open up Jing on your computer. Set up a free account with Jing. When Jing is running, it has this yellow sun icon in the top middle of your screen. It looks like this:

3. Taking a Screenshot
Now that you have installed Jing and set up an account, you can take a screenshot.When you hover your mouse over the Jing icon (the yellow sun), you have 3 options: Capture, History, and More. We want to create a screenshot, so click on Capture.

A yellow cross-hair will come up, and your screen will become grayed out, like so:
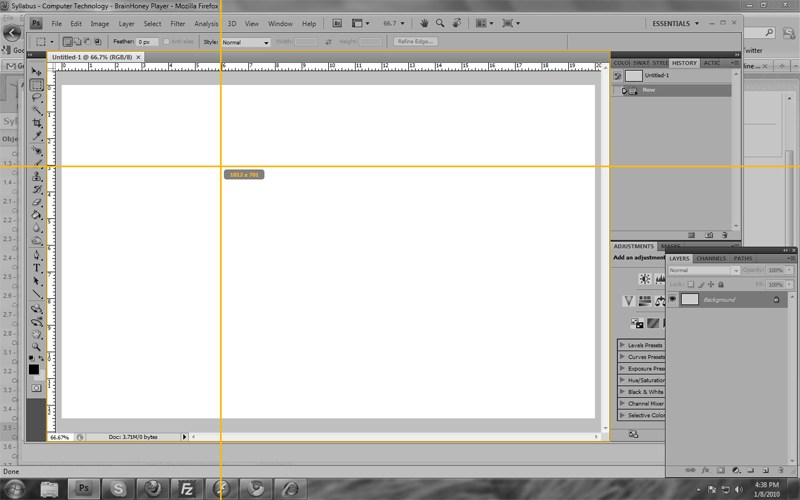
Use the cross-hair to click, hold down with the mouse and drag a square around what you want to take a picture of on your screen. The image inside of your square will turn back to color (instead of black and white).
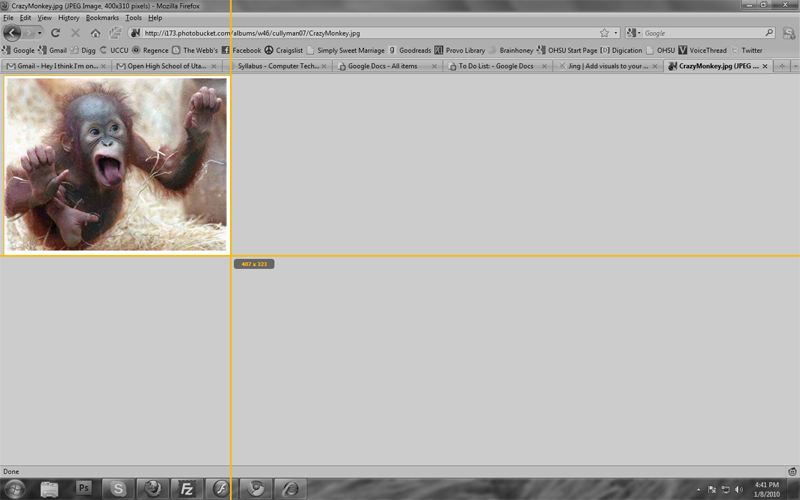
When you let go of the mouse (after you have clicked and held down and dragged a square), a Jing menu will appear. (see below) The button that is shaped like a Polaroid picture is the "Capture Image" button. Click it.

A window will now pop up with your selected screen square and editing options. Here you can use the "T" tool to type text onto the image, draw on your image, etc etc.

See the bottom of that editing window where it says "Name"? Type what you want to name your image right there.

Now we need to save your image to your computer. See the second button from the left, the one that looks like a floppy disk? Click that button. A window asking you where you want to save your image will pop up. Select a location on your computer (Like My Documents, or My Pictures. I have an "Open High School" folder that I made on my computer.) and click SAVE.
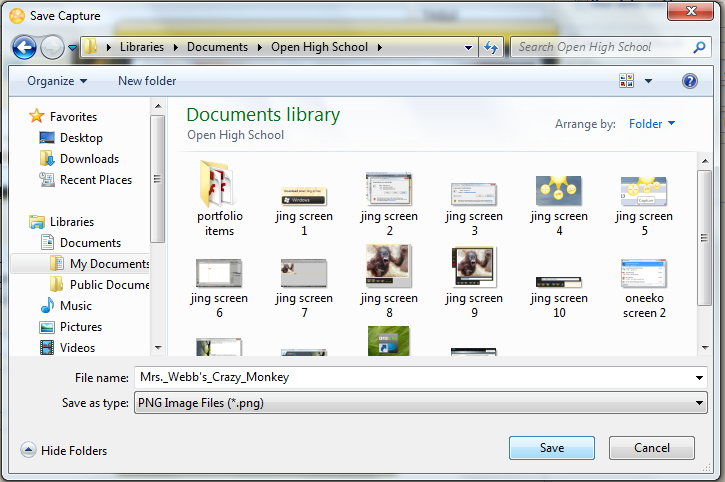
You have now successfully saved your screenshot to your computer!